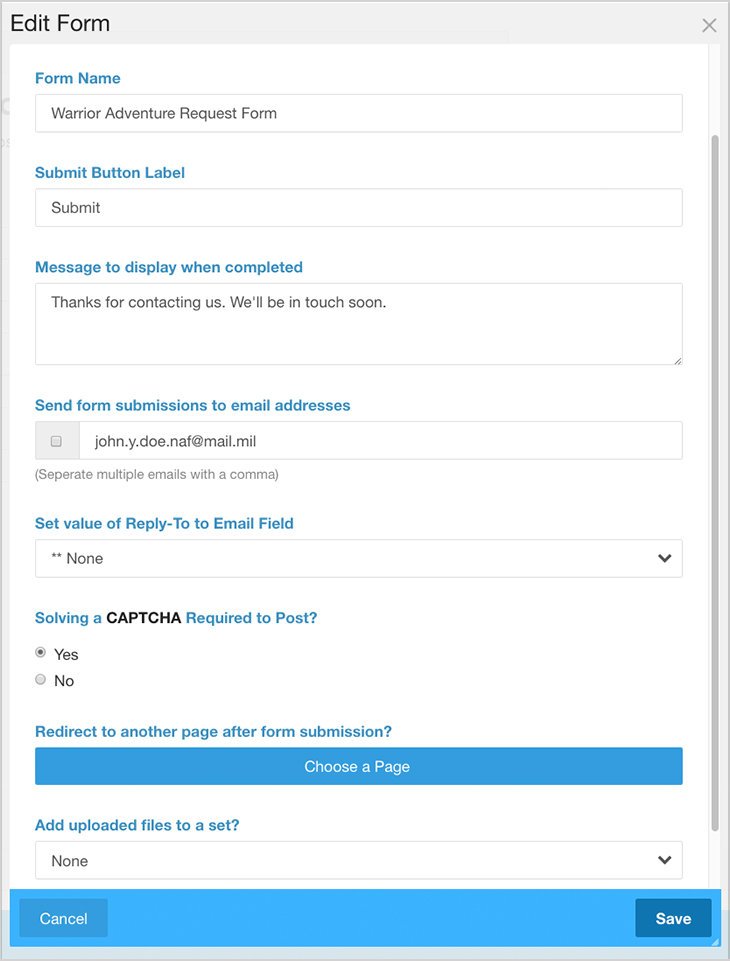
- The email address of the person you want the form submitted to will be hidden from public view.
- If you clicked Add in the blue bar, you’ll need to re-open the form. Click the Edit (pencil icon) tab.
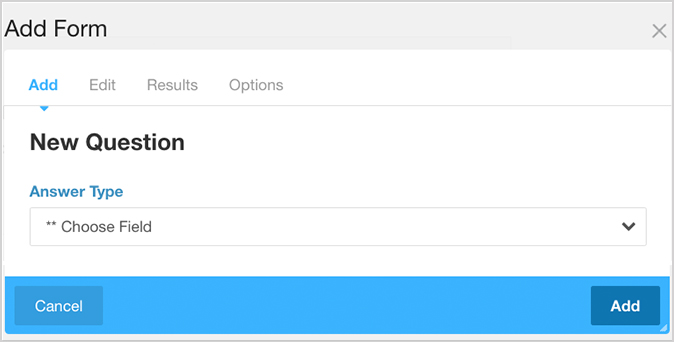
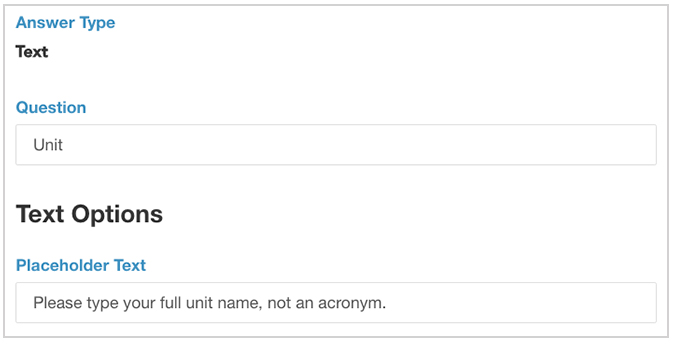
- Answer Type – lists choices for the type of response you want (typed answer, multiple choice, etc.). There are many Answer Types to choose from. Experiment!
- Question – Use this space for your question or text.
- Placeholder text – To add instructions or hints for the reader.
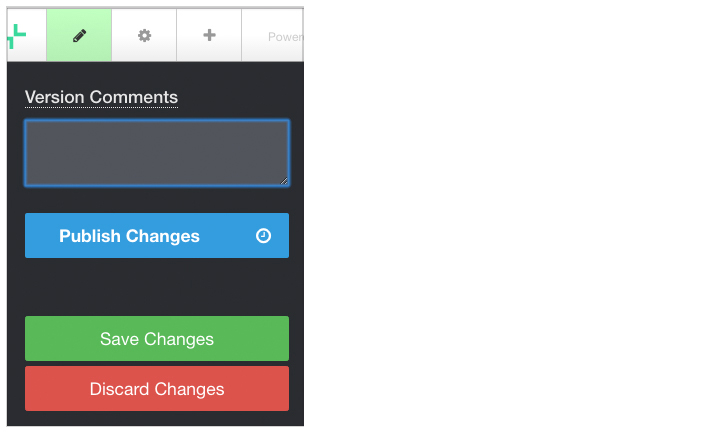
- Save Changes - saves the newly-created form as a draft.
- Publish Changes - Saves and publishes immediately to your live site.
Creating Forms
Forms enable you to interact directly with your customers. Use Forms to ask questions, initiate contact between customers and program managers, invite people to request services, etc.
Army IT regulations limit the amount of personally identifiable information (PII) you can collect. Before creating your form, please read the user guide, General Data Collection SOP.
First, let’s look at the functions:
Add Form – Start a new form and begin adding questions.
Edit – Make changes at any time while creating, after saving or publishing.

Options – Additional details
Always use the CAPTCHA button to prevent non-human and automated spam responses.
Start Creating a Form
1. Click the + tab at the top-left of your screen to access the Blocks panel.
Locate the Form icon. Click and drag it into an Empty Content Block.
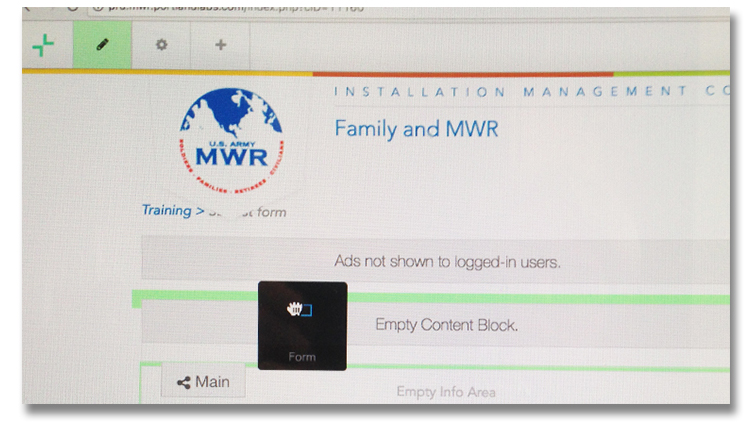
Select New Form.
2. To add a title, select Display Text from the drop-down menu (bottom).
Type the form title into the Headline box. Add any additional information into the Body.
Click Add Question to start adding questions/content to your form.
After creating each question, click Add question and then proceed to the next one.
The Add/Save button in the blue bar saves a draft of your form.
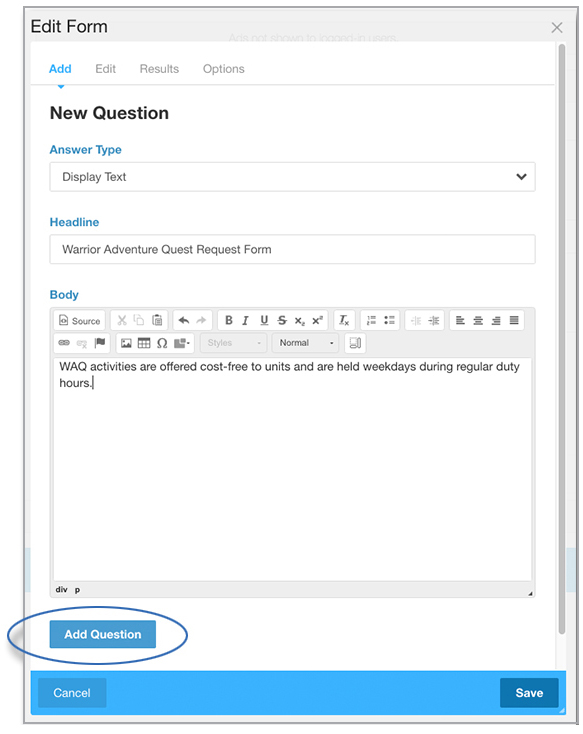
After each question, click Add Question. The Edit Form will reappear so that you can continue adding more.
How to add multiple choice questions
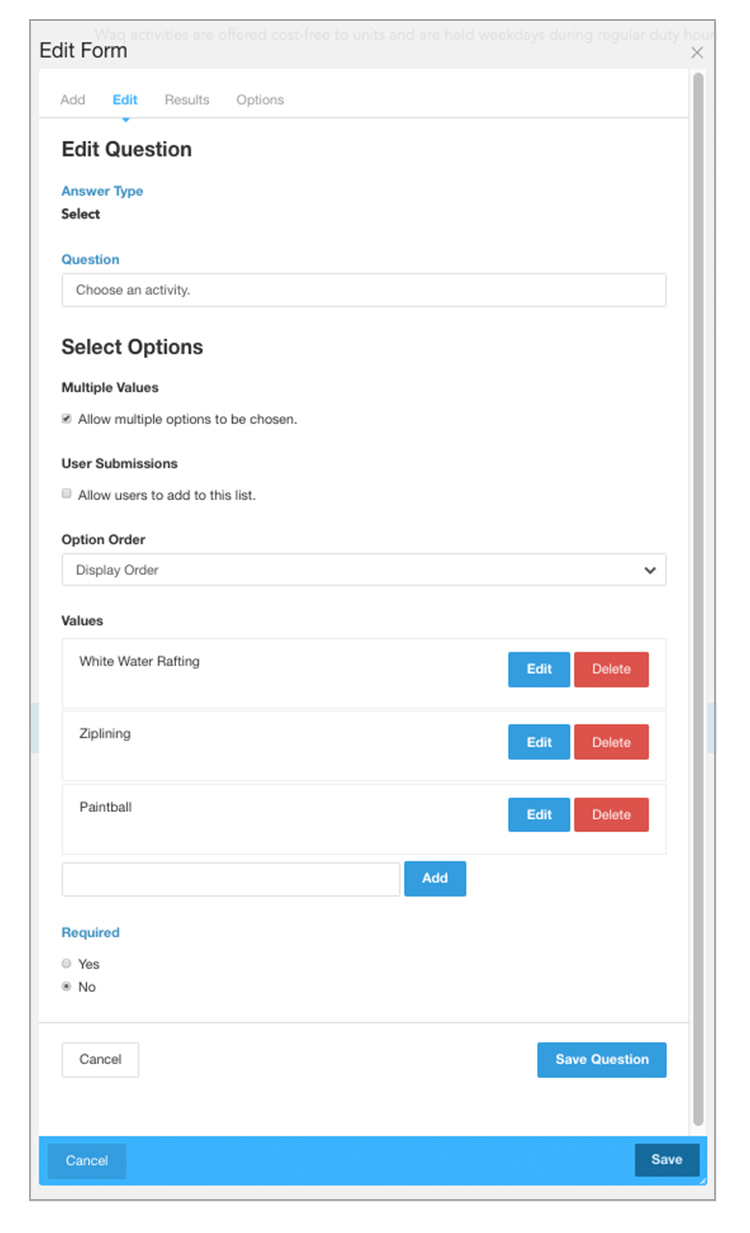
1. Answer type: Select
2. Question: Introduce the choices you will list.
3. Click the Multiple Values checkbox to be able to add multiple choices.
Option Order – Lets you arrange your list.
4. Values – This is where you’ll add your list of choices. Add each one individually in the text box and click Add.
5. After you've added all the items on the list, click Add Question to continue adding to the form.
6. When complete, click Save in the blue bar.
Remember, if you hit Save prematurely, you can re-open the form using the Edit (pencil icon) tab
After you’ve completed your form, click the edit tab for a final save.
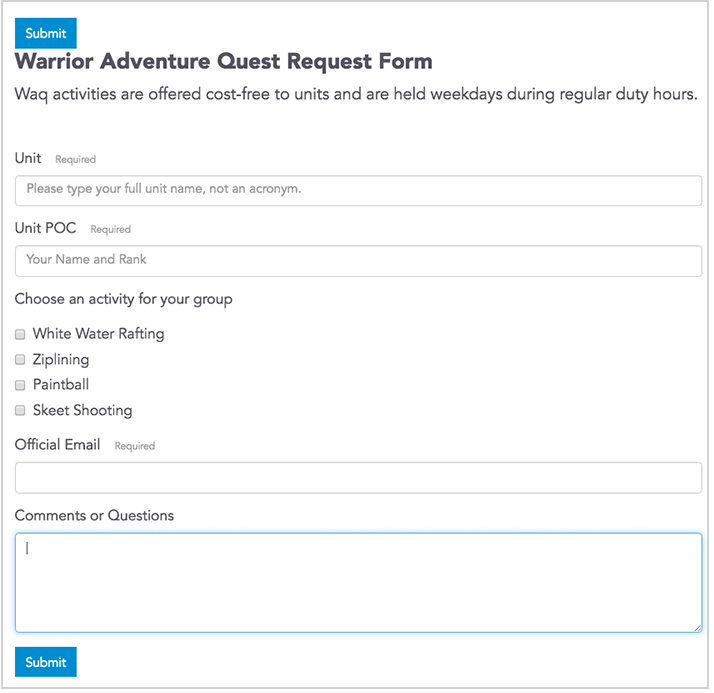
Here’s a view of a finished form containing multiple choices.