- You can select an existing image to place into your content block.
- You can upload a new one following the steps in method 1.
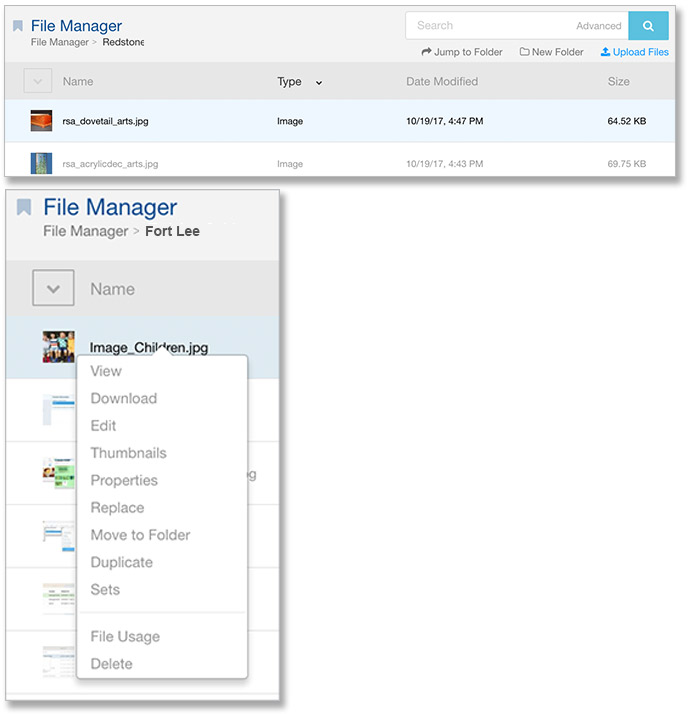
- Click any column heading in the title bar to organize files. Want to sort by file type? Click Type to view documents or images. Want to sort by date? Click Date Modified.
- Right-click any image file to access image options. Select Properties to edit the file name, description or add tags.
- Click Sets to add it to an existing Set or, add a new Set.
- To go back, click File Manager in the breadcrumb trail (path) – do not click the browser back button.
File Manager
How to load and place images and linked files
Upload images
There are 2 ways to load images and files to the File Manager. Use the Dashboard button or from within a content block you are editing.
Method 1
At the Welcome Screen, click the Dashboard button and select Files. The File Manager panel will appear.
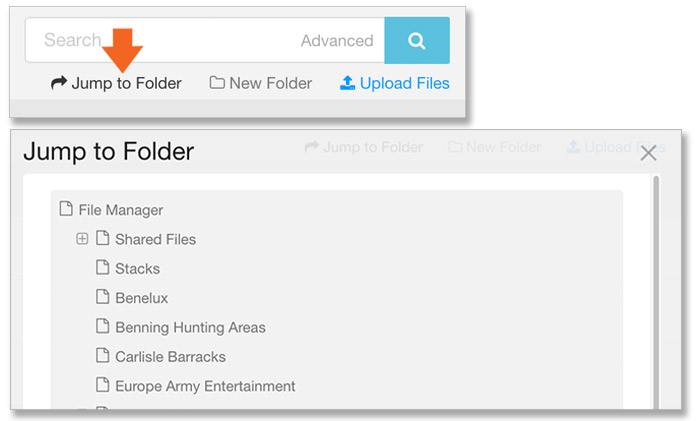
Click "Jump to Folder" and navigate to/open your garrison folder. Always load images and document files into your own garrison folder. This gives you complete control over how your images are used and makes them easier to find.
Choose Upload Files
Drag and drop images (JPGs) or files (PDFs, Word Docs, Excel) from your computer into the open space. Files will automatically start to upload.

When the green bar below the image is fully-loaded, your file is now saved in the File Manager.
Title, Description and Tags are all editable. Click the field area and edit the file name, add a description of the file and add tags to make it easier for you and others to search for this file. Click the X to save/close.
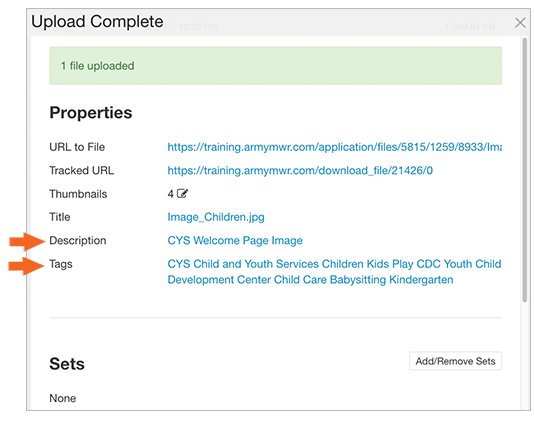
Click Add/Remove Sets to organize files for easy retrieval. Using sets is a great way to organize files into categories.
Method 2
Uploading from inside a content block:
Click the Image icon in the Tools panel.![]()
![]() Choose the Browse Server button.
Choose the Browse Server button.
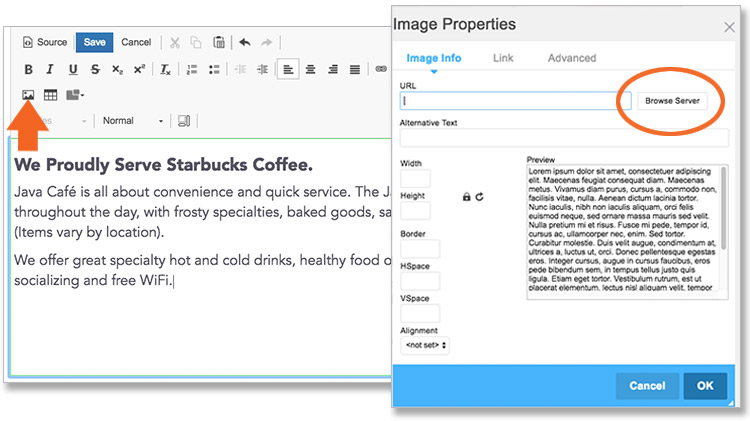
The File Manager panel will appear.
The preview panel showing a portion of your image will appear. Click OK.
The image will then import into your content block.
Save/Publish
Navigating the File Manager
Once files are uploaded in the File Manager you can sort, organize and access image options.
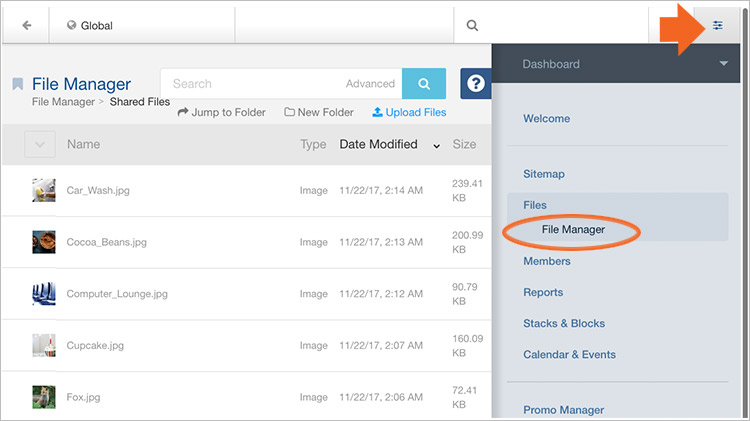
Using images from the Shared file folder
Use the “Jump to Folder” to navigate to the Shared folder.
The Shared folder contains thousands of images that have been loaded by other MWR Marketing web Approvers and Authors. The images are available for you to use on your own website pages. You should copy and save the image to your own garrison folder. Do not delete or change the image in the Shared folder. If others have loaded the image from Shared onto their own pages, any change will affect their pages, too.
To copy and save an image from Shared to your folder:
1. Type a word into the Search to filter images for your topic or theme.
2. Right-click a thumbnail and choose View. Click and drag the image onto your desktop and re-name it.
3. Use the “Jump to Folder” to navigate to your garrison folder.
4. Click Upload Files (upper right of File Manager, under Search). Upload the image.